Chocolate Peanut Butter Puffs

Chocolate Peanut Butter Puffs

It’s happening…the cravings for anything sweet dipped in chocolate, peanut butter or caramel. Well, pretty much anything sweet at all. And no, I am not pregnant…it’s the Holiday Season!

I’m not much of a baker and I usually crave a giant bowl of queso over anything sweet. But this time of year brings out my sweet tooth and the urge to experiment in the kitchen.

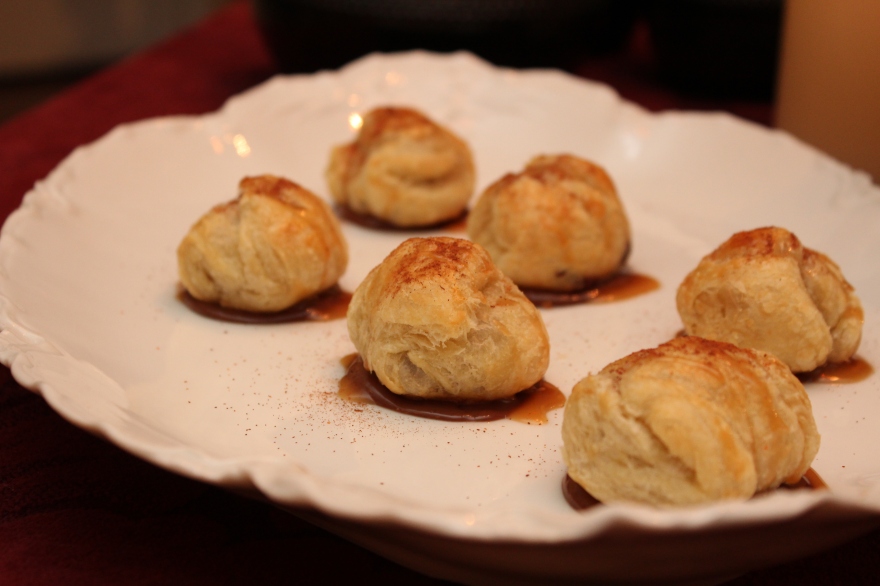
I’m obsessed with Reese’s. It’s my favorite candy combo and what could be more delicious than chocolate and peanut butter wrapped in buttery flakey dough, dipped in more chocolate and caramel, sprinkled with a hint of spice and cinnamon. That crazy concoction was in my head tonight and voila…Chocolate Peanut Butter Puffs. I couldn’t get the damn lighting right in the kitchen tonight for my pics but take my word for it…these are sinfully delicious!

Happy Eating!


Chocolate Peanut Butter Puffs

Serves 15 puffs

Ingredients

  • 1 sheet puff pastry, thawed
  • 1 package Reese’s Peanut Butter Bells or Reese’s Peanut Butter Cup Minis
  • 2 eggs
  • heavy cream
  • Nutella [around 15 teaspoons]
  • caramel sauce
  • cayenne pepper
  • ground cinnamon

Preheat oven to 350 degrees.

Chocolate Peanut Butter Puffs

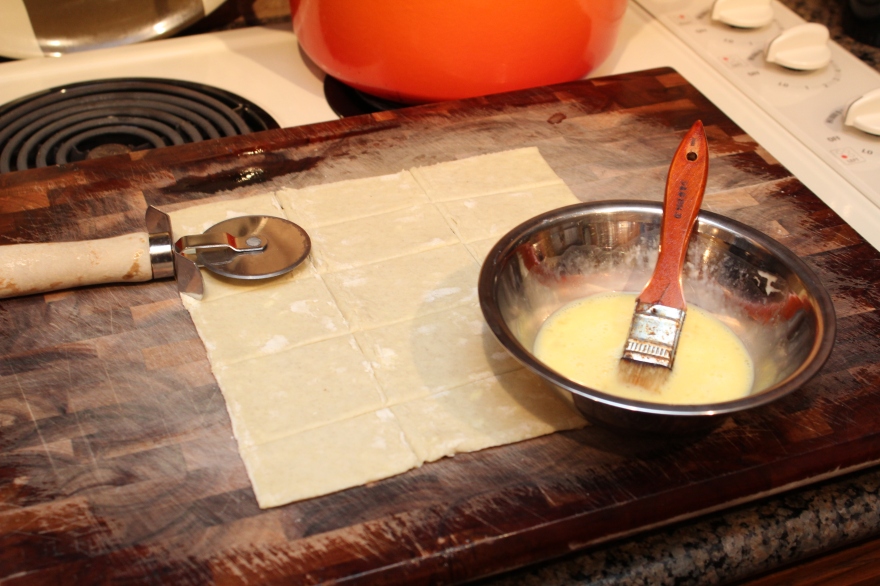
Cut the puff pastry into 15 squares using a pizza cutter.

Chocolate Peanut Butter Puffs

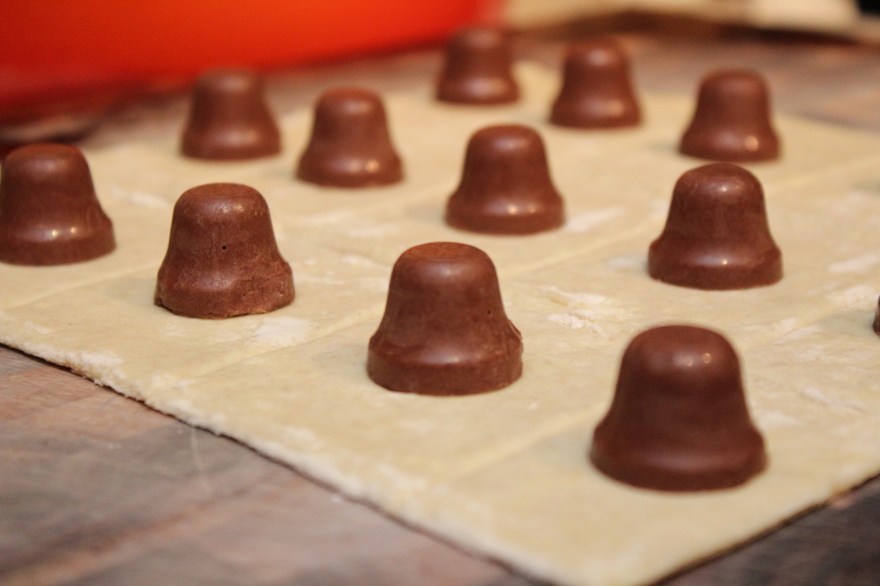
Place 1 Reese’s Peanut Butter Bell on the center of each square.

Chocolate Peanut Butter Puffs

Chocolate Peanut Butter Puffs

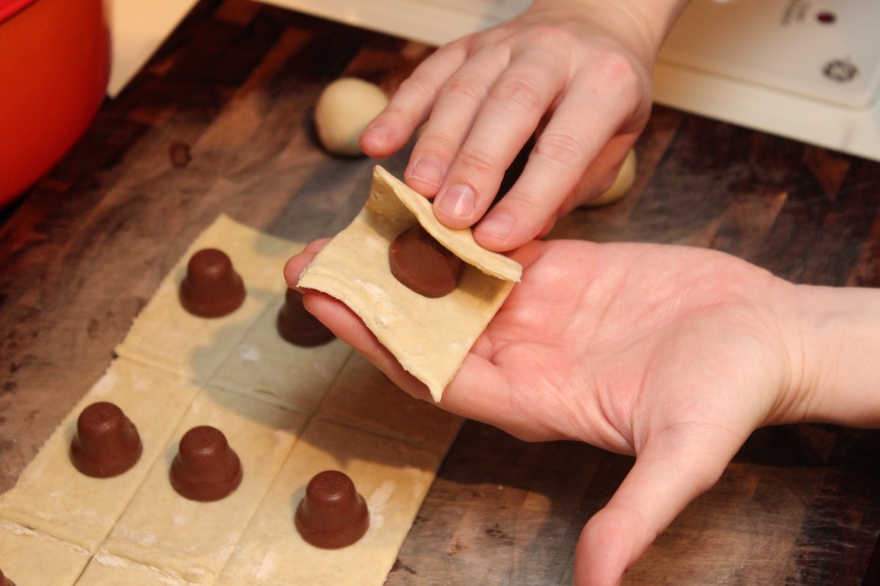
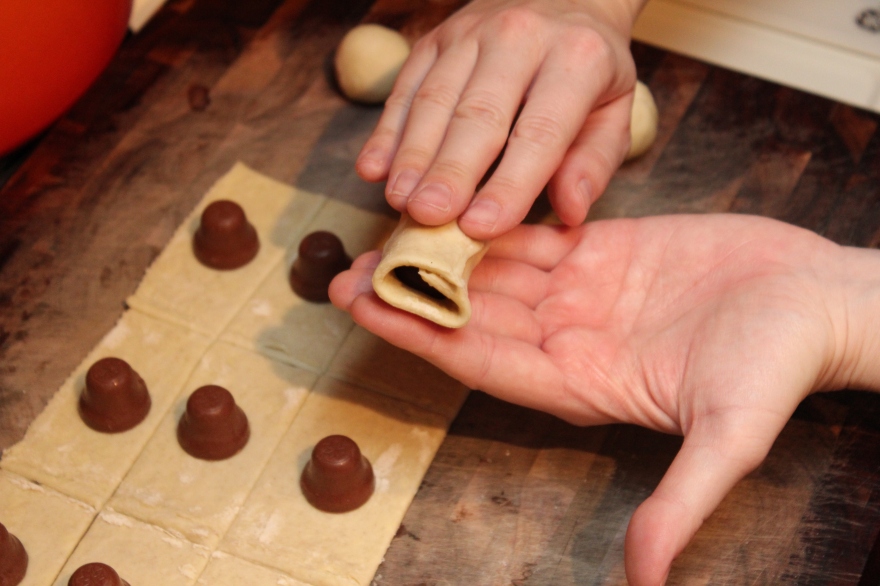
Wrap the pastry around the bell.

Chocolate Peanut Butter Puffs

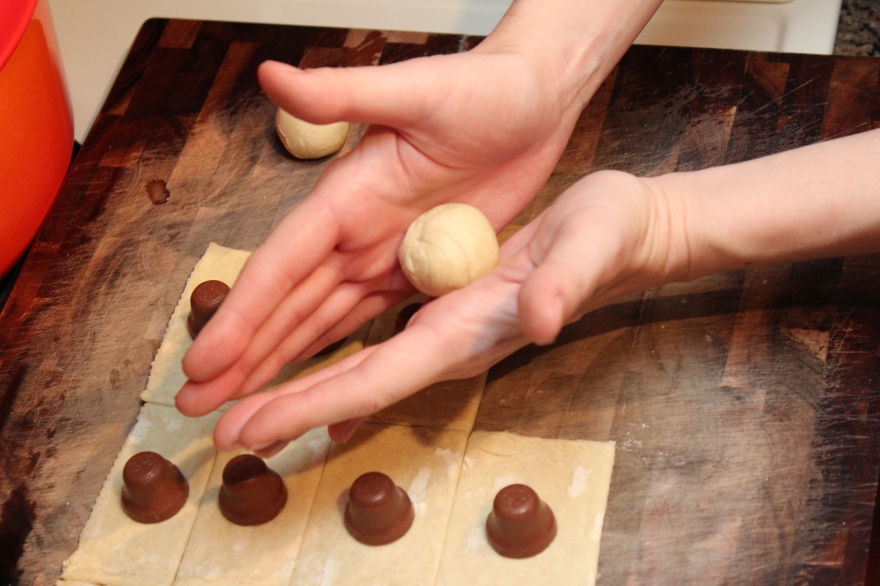
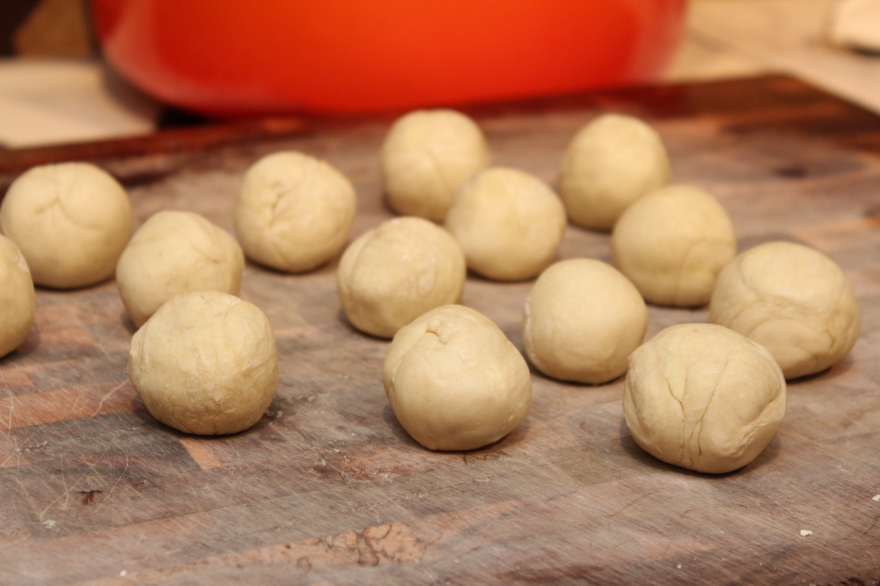
Roll in the palm of your hands to make a ball.

Chocolate Peanut Butter Puffs

Place on a cookie sheet lined with parchment paper or lightly coated with cooking spray.

Chocolate Peanut Butter Puffs

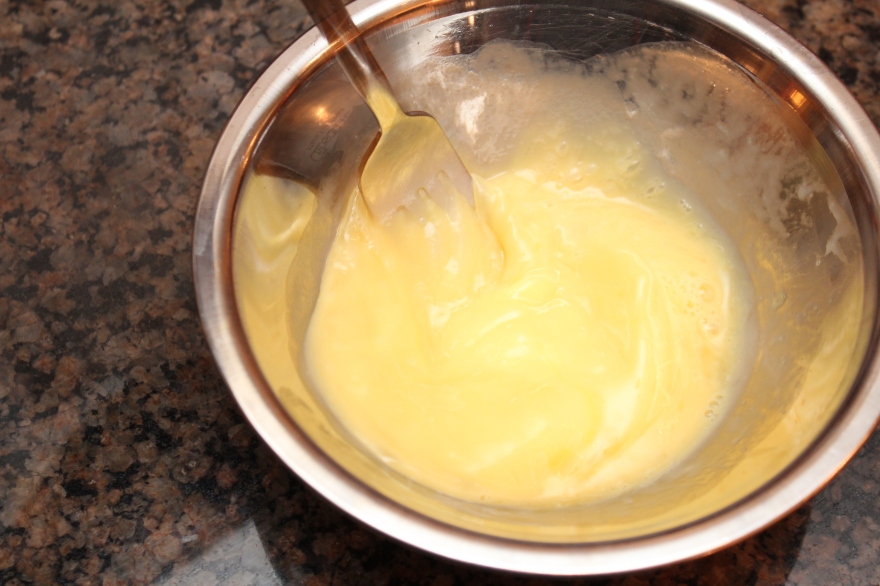
Mix the eggs with a dollop of heavy cream and whisk to make the egg wash. Using a pastry brush, lightly brush each puff with the wash. Place in the oven and bake for 20 minutes until the dough is cooked through and lightly golden.

Chocolate Peanut Butter Puffs

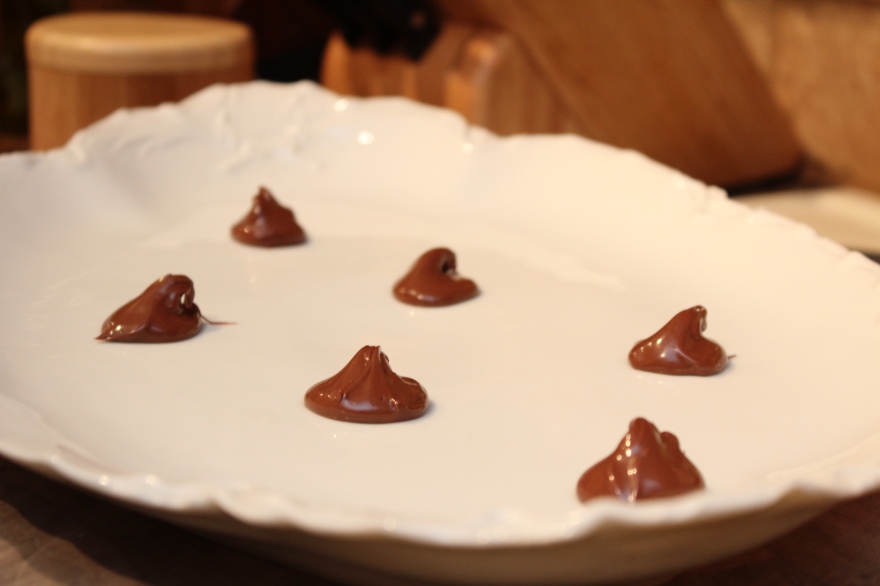
Place a teaspoon of the Nutella on a serving platter for each puff. The puffs will sit on top of the Nutella so make sure they are spaced a part.

Place a single puff on top of each dollop of Nutella. Drizzle with the caramel sauce and lightly sprinkle with the cayenne pepper and ground cinnamon. Be careful with the cayenne…a little goes a long way!

Chocolate Peanut Butter Puffs

Bon Appetit & Happy Holidays!

Loaded Baked Potato Wedges

Loaded Baked Potato Wedges

The holiday season always gets me in the mood to cook. I saw an ad in my Cooking Light magazine featuring the cutest potato wedges with assorted toppings and I had to give them a try. I used my mandolin to get exact sizes so that the potatoes cooked evenly. It was super easy and fun to think of different toppings…the skies the limit!

When I think of potato appetizers I  automatically think of traditional potato skins with cheddar cheese and bacon bits. These felt a lot lighter and packed way more flavor than the traditional recipe. So get creative and make this tasty recipe for your next holiday party!

Happy Eating & Happy Holidays!


Loaded Baked Potato Wedges

Ingredients

  • 2 large russet potatoes
  • 1-2 tablespoons olive oil
  • 2 tablespoons fresh thyme, minced
  • salt and pepper

Toppings

  • 1 can refried black beans [try my Spicy Black Bean recipe here – mash at the end for desired consistency]
  • 1/2 cup light sour cream
  • 2 tablespoons chives, minced
  • 1 cup salsa [try my Spicy Fire Roasted Salsa]
  • Black Bean Corn Relish [see recipe below]
  • 1/4 cup chopped cilantro
  • 1 cup guacamole [try my Savory Southwest Guacamole]
  • 1/2 cup Mexican blend shredded cheese

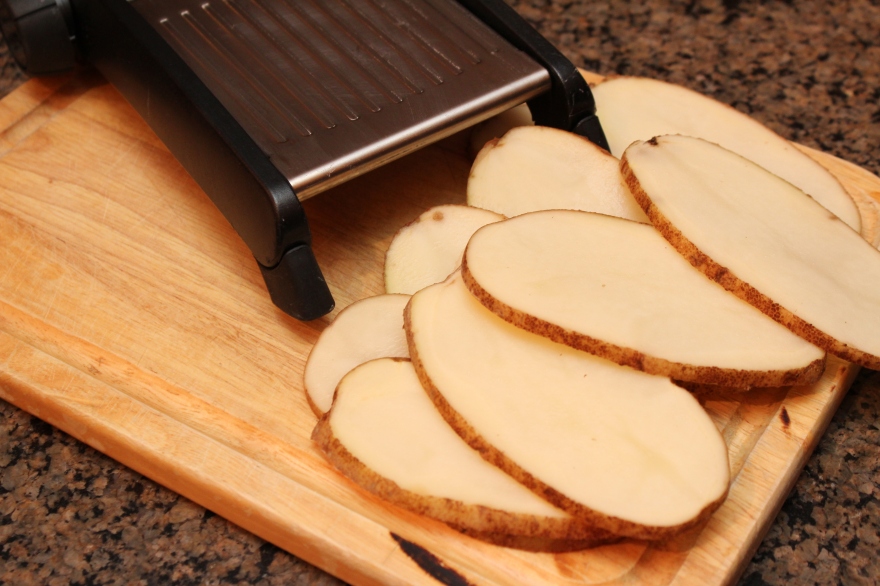
Preheat oven to 350 degrees and lightly grease 2 cookie sheets. Using a mandolin, cut the potatoes into 1/4 inch slices and place on the cookie sheets, making sure the slices don’t touch.

Loaded Baked Potato Wedges

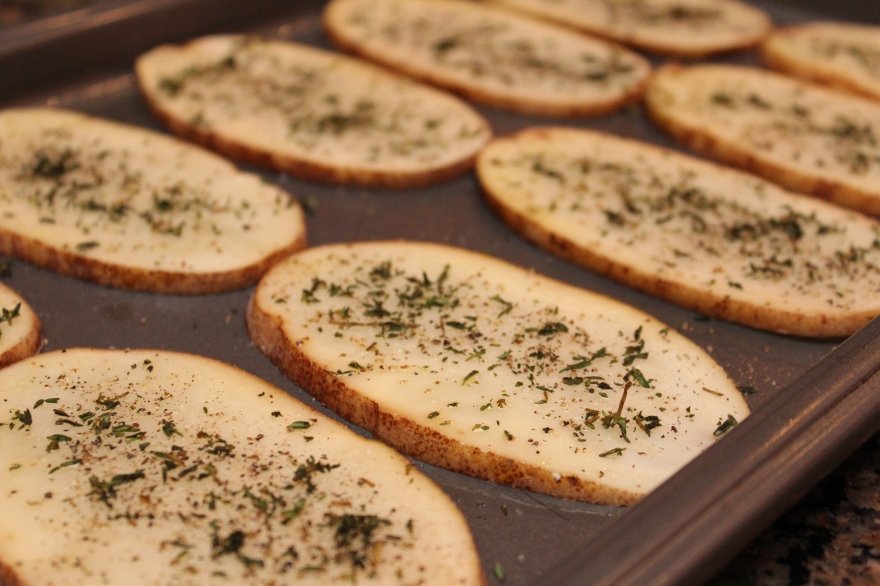
Using a pastry brush or the back of a spoon, lightly coat potato slices with half the olive oil. Season with salt and pepper, and sprinkle with half the thyme. Bake for 5 to 8 minutes.


Loaded Baked Potato Wedges

Flip the potatoes over and brush with remaining oil, salt, pepper, and the rest of the thyme. Bake another 5 to 8 minutes, or until tender and golden on both sides. Remove from the oven, lightly blot with a paper towel to remove excess oil, and transfer to a serving platter.

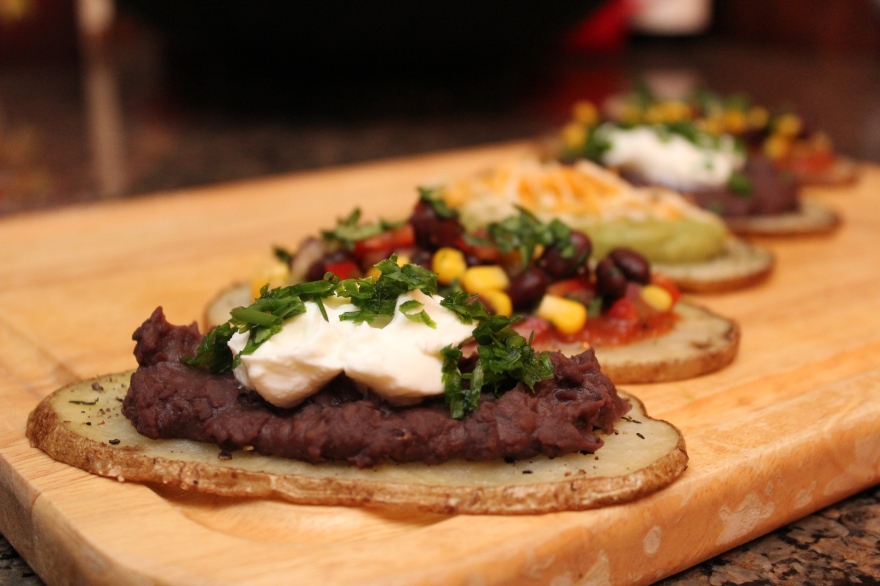
For the first topping, spread a spoonful of the refried beans onto a slice. Top with a dollop of sour cream and sprinkle with the chives.

For the second topping, spread a spoonful of the salsa onto a slice. Top with another spoonful of the relish and sprinkle with the cilantro.

For the third topping, spread a spoonful of the guacamole onto a slice. Top with the shredded cheese.

Black Bean Corn Relish

  • 1 cup yellow corn kernels, rinsed and drained
  • 1 cup black beans, rinsed and drained
  • 2 tablespoons red bell pepper, diced
  • 1 tablespoon jalapeno pepper, minced
  • 2 tablespoons red onion, diced
  • 2 tablespoons cilantro, chopped
  • 1 tablespoon fresh lime juice
  • 1 teaspoon cumin
  • 2 teaspoons chile powder
  • salt and pepper

Combine all of the above ingredients in a medium size bowl and mix until well combined. Taste and adjust seasoning.

Bon Appetit! 

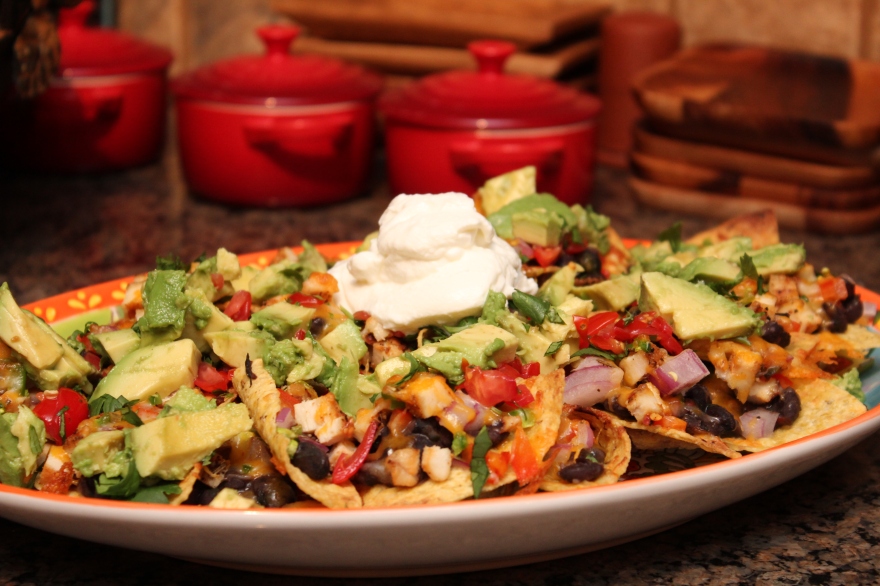
Southwest Chicken & Black Bean Nachos

Southwest Chicken & Black Bean NachosYesterday was pretty glorious…and by glorious, I mean lazy! I’m usually gigging on Sunday afternoons and after a late night gig on Saturday it can be pretty exhausting. Since I had the day off yesterday I figured I would do absolutely nothing and get some rest. So for dinner I opened up some wine and the refrigerator and threw some ingredients together for this delicious plate of nachos.

I’m notorious for buying too many groceries so this was a perfect recipe to use up some leftover chicken, beans and veggies. I spent a little more time adding ingredients to each chip instead of just piling everything on and it was worth it! The cheese kept the ingredients on each chip so no spillage when you go to dunk your chip into some salsa.

Happy Eating!


Southwest Chicken & Black Bean Nachos

Ingredients

  • tortilla chips
  • 1 cup cooked black beans (recipe below)
  • 1/2 cup diced red onion
  • 1/2 large jalapeño, diced
  • 1/4 cup diced red bell pepper
  • 1 cooked chicken breast, diced
  • mexican style taco shredded cheese
  • 1/2 cup diced tomato
  • 1 diced avocado
  • chopped cilantro
  • sour cream

Spread a single layer of tortilla chips on a large non stick cookie sheet.

Top each chip with a spoonful of black beans then top evenly with the red onion, jalapeño, bell pepper and chicken.

Top each chip with as much cheese as your heart desires.

Broil until the cheese is melted and the chips are golden (around 5-7 minutes).

Move to a serving platter and garnish with the diced tomato, avocado and cilantro.

Top with two large dollops of sour cream.


Spicy Black Beans

Ingredients

  • 1 tablespoon extra virgin olive oil
  • 1/4 cup diced red onion
  • 1/2 jalapeño, diced
  • 2 tablespoons diced red bell pepper
  • 1 garlic clove, minced
  • 1/2 tablespoon chile powder
  • 1/2 tablespoon cumin
  • kosher salt and pepper
  • 15oz can black beans
  • 1/4 cup chopped cilantro

In a medium sauce pan heat the olive oil over medium high heat and sauté the onion, jalapeño and bell pepper until softened.

Add the garlic, chile powder, cumin, salt and pepper and sauté until fragrant.

Add the black beans and cook until liquid is reduced and no longer runny.

Stir in the cilantro and adjust seasoning.

Bon Appétit!


Rotisserie Chicken Salad and Cucumber Bites

Rotisserie Chicken and Cucumber

Summer has officially arrived in Texas and it’s hot as hell. The usual heavy culinary fare doesn’t really satiate my palite in the 100+ degree, super dry temperatures so I try to stick to lighter snacks. I made these delicious little treats a few months back and thought they would be perfect for a summer snack by the pool.

The watery cucumber pairs beautifully with the ripe avocado and chicken salad. The only reason I minced the bell pepper for a garnish was to bring some color to the pics but it topped off the dish perfectly!

What’s your favorite summer snack? Let me know in the comment box below!

Happy Eating!


Rotisserie Chicken Salad and Cucumber Bites

Ingredients

  • whole rotisserie chicken, skin removed
  • 3 tbsp green onions, chopped
  • 1/2 cup mayonnaise
  • 1/2 tsp kosher salt
  • 1/4 tsp cracked black pepper
  • 1 cucumber, thick slice
  • 1/2 avocado, diced
  • 1 tbsp red bell pepper, minced

Rotisserie Chicken and Cucumber Bites

Remove the skin from the chicken and place in a large bowl. Shred with a fork. Add the green onions, mayonnaise, salt and pepper.

Rotisserie Chicken and Cucumber Bites

Mix until well combined.

Rotisserie Chicken and Cucumber Bites

Slice the cucumber into thick circles and top with the chicken salad. Spoon a small amount of the avocado on top of each piece and sprinkle with the red pepper.

Rotisserie Chicken and Cucumber Bites

Bon Appétit! 

Recipe and Song of the Day: Beef Veggie Noodle Soup & Tristan Prettyman

Just when you think it’s getting cold in Texas you get shocked with a jolt of 90 degree heat. BUT that won’t stop me from getting in the Fall/Holiday spirit. I love making a big pot of soup when the weather starts to cool. It’s simple, comforting, and you can eat it all week.

I decided to hold off on posting yesterday’s Song of the Day so I could make it a joint food and music post. So dig into this delicious Beef and Veggie Noodle Soup recipe and enjoy this track off Tristan Prettyman’s latest release, Cedar + Gold. Thanks to one of my girlfriends for introducing me to Miss Prettyman. Her chill vocals and lyrical style is a cross between Colbie Caillat and Sara Bareilles. Check out My Oh My!

Happy Listening!


Beef Veggie Noodle Soup


Ingredients

  • 1 medium yellow onion, chopped
  • 1.5 pounds lean ground sirloin
  • 1 tbsp Nature’s Seasoning*
  • 2 tsp celery seed*
  • 1 tsp kosher salt
  • cracked black pepper
  • 2 extra large beef bouillon cubes
  • 2 cans beef consomme (Campbell’s)
  • 2 cans water
  • 32oz container beef broth
  • 1 can tomato soup (Campbell’s)
  • 1 can sweet corn – do not drain
  • 1 small bag mini carrots
  • 3/4 head green cabbage, chopped
  • 6oz bag green peas
  • 1 bag shell pasta

**The seasonings are not exact measurements. Make sure you are tasting and adjusting along the way!

Heat the olive oil in a large dutch oven over medium high heat. Saute the onions until slightly transparent. Add the ground beef, Nature’s Seasoning, celery seed, salt and pepper.

Saute until no longer pink.

Add the bouillon cubes, beef consomme, water and beef broth. Bring to a boil and simmer on medium low for 45 minutes to an hour, stirring periodically. Taste and adjust seasoning accordingly.

Stir in the tomato soup, corn and carrots. Bring to a slow boil and cook until the carrots are slightly tender.

Add the cabbage and cook for 5-10 minutes.

Add the peas and pasta and cook until the pasta is al dente. If the soup is too thick add more water and adjust seasoning.

Bon Appetit!

Tristan Prettyman Photo Source: Speakers in Code

Skillet Roasted Chicken with Lemon & Herb Pasta

I decided to take a break from music tonight and get reacquainted with my kitchen. A shameful 23 days has past since my last meal post and tonight was the perfect night to bring you guys a new recipe.

Things have been so crazy the last month and I was completely drawing a blank on what to cook. Thankfully, Food Network was reading my mind and served up one of the best recipes I’ve made in a long time. I added my own little flair to the pasta and it turned out to be the quickest and tastiest pasta I’ve ever made.

Skillet Roasted Chicken with Lemon & Herb Pasta

Recipe adapted from Food Network’s Skillet Rosemary Chicken

Ingredients

Chicken

  • 3/4 pound small red-skinned potatoes, halved, or quartered if large
  • Kosher salt
  • 2 sprigs fresh rosemary, plus 1 tablespoon leaves
  • 1 clove garlic, smashed
  • Pinch of red pepper flakes
  • Juice of 2 lemons (squeezed halves reserved)
  • 2 tablespoons extra-virgin olive oil
  • 4 skin-on, bone-in chicken breasts (6 to 8 ounces each)
  • 10 ounces cremini mushrooms, halved

Pasta

  • 8oz Penne Pasta
  • 1 tbsp rosemary leaves
  • 1/4 cup fresh parsley
  • 1/2 lemon, juiced (make sure it’s a juicy one)
  • 1/4 tsp red pepper
  • 1/4 kosher salt
  • 1/4 black pepper
  • 1/4 cup shredded parmigiana reggiano
  • drizzle of olive oil

Preheat the oven to 450. Cover the potatoes with cold water in a saucepan and salt the water. Bring to a boil over medium-high heat and cook until tender, about 8 minutes; drain and set aside.

Pile the rosemary leaves, garlic, 2 teaspoons salt and the red pepper flakes on a cutting board, then mince and mash into a paste using a large knife. Transfer the paste to a bowl. Stir in the juice of 1 lemon and the olive oil. Add the chicken and turn to coat.

Heat a large cast-iron skillet over medium-high heat. Add the chicken, skin-side down, cover and cook until the skin browns, about 5 minutes. Turn the chicken; add the mushrooms and potatoes to the skillet and drizzle with the juice of the remaining lemon.

Add the rosemary sprigs and the squeezed lemon halves to the skillet; transfer to the oven and roast, uncovered, until the chicken is cooked through and the skin is crisp, 20 to 25 minutes.

While the chicken is roasting cook the pasta until al dente. Lightly drain and return to the pot. Mince the rosemary and parsley together and stir into the pasta with the remaining 6 ingredients.

Serve each chicken breast with a drizzle of sauce, veggies and the pasta.

Bon Appetit!

Lobster Rolls in Dallas? Hell yes…gimme some!

A few years back I wrote about a unique find near the DFW airport, Lobster Harvest. This my friends is where Lobsters come to retire, where the weakest links find their way on my plate for a fraction of the cost. Now keep in mind, we are not in Maine, and today’s soothing 106 degrees reminded us all that for us here in Texas, summer is far from over.

Even though we’re hundreds of miles away from fresh succulent lobster doesn’t mean it isn’t here for us to enjoy. So since you all made Discounted Lobster in Dallas? one of my most popular posts I thought I would step it up a notch and tell you where you can buy delicious, plump, and slightly more expensive lobster.

Central Market never fails to amaze me. Between an abundance of the freshest produce in Dallas you can find an array of exotic fruits, any type of stuffed, seasoned and picture perfect meat and of course, the freshest seafood I’ve seen in the city. I haven’t sampled all of the many fish markets in the metroplex but out of the few I’ve tried, I always find my way back to Central Market.

On that note it can get pretty pricey for a normal week night meal, BUT every week like a mini present in my Inbox I receive their weekly specials that always have a seafood special. Lobster is on that list quite a bit ranging from $5.99 for a lobster tail or per pound for fresh Maine lobster.

I apologize in advance for the redundant recipe (not really) but I can’t resist a plump lobster roll when I see $5.99 a pound. So for those of you in the DFW area check out Central Market, subscribe to their newsletter and prepare to not be disappointed.

Lobster Rolls 2012

Serves 4 small rolls or 2 large

  • 1 pound fresh steamed lobster meat (around two 1.5 pound lobsters)
  • 2 tbsp green onions, diced
  • 1 tbsp parsley, finely chopped
  • juice from half a lemon
  • 1/4 cup light mayonnaise
  • kosher salt and pepper
  • hot dog buns or rolls

Remove the freshly steamed meat from the shells and rinse. Pat dry and chop into bite size chunks. Toss in a medium size bowl with the green onions, parsley, lemon juice and mayo.

Season with the salt and pepper according to taste.

Toast the buns and fill with the delicious meat!

When I’m making lobster I want to taste the full flavor of the meat so I avoid crowding it with too many ingredients.

Bon Appetit!

Shrimp with Tomato, Basil & Peppers

Matt and I made the brave decision to tackle the Advocare Herbal Cleanse for 10 whole days. Now at first, I have to admit that I didn’t really see it as that big of a challenge. Unlike the dreaded liquid cleanse you actually get to eat whole food on this one. What’s not to love about fruits, veggies, chicken and fish….fast forward to day 9. My palette is screaming for variety…a sip of wine…a slice of cheese smashed in between a loaf of bread. Le sigh.

The good news is I survived and feel pretty damn good. A full recount of our last 10 days will go up tomorrow. Until then, I had to post this ridiculously healthy, simple and delicious shrimp recipe!

Now excuse me while I go steam some more veggies….

Shrimp with Tomato, Basil & Peppers

Ingredients

  • no fat olive oil cooking spray
  • 1 small yellow onion, sliced
  • 1/2 green bell pepper, sliced
  • 1 large garlic clove, julienne style
  • 1/2 tsp kosher salt, divided
  • 1/2 tsp black pepper, divided
  • 1/2 tsp crushed red pepper, divided
  • 1 tsp fresh thyme, minced
  • 1 tbsp fresh lemon juice, plus extra for drizzling
  • 1/4 cup chicken stock
  • 1 pound peeled and deveined shrimp
  • 1 small tomato, seeds removed and chopped
  • 1 tbsp fresh basil, chopped

Heat a large dutch oven over medium high heat and lightly coat with the olive oil spray. Saute the onions and peppers until soft. Add the garlic and saute an additional 30 seconds. Add 1/4 teaspoon of the salt, black and red pepper, all of the thyme, lemon juice and the chicken stock. Saute until the chicken stock has slightly reduced.

Season the shrimp with the remaining salt and pepper and drizzle with some of the fresh lemon juice. Add the shrimp to the onion mixture and cook until nice and opaque. Stir in the tomatoes and basil and remove from the heat.

Serve along side a crisp romaine salad with creamy chunks of avocado, tomato, sliced onion, red pepper, fresh lemon and a drizzle of olive oil.

Bon Appetit!

Basil Fruit Tarts with Creamy Yogurt

For most of my life I’ve loved summer. What’s not to like? Long days, ice cream, warm nights on the lake, fresh fruit, swimming pools….then I moved to Texas. Don’t get me wrong, I love the Lone Star State, but damn it’s hot. Thank god this summer hasn’t been remotely as excruciating as the last, in fact, it’s reminded me of all the reasons I love summer.

Basil is one of my favorite herbs to grow. It’s super easy and produces an abundance of fresh basil the entire spring and summer season. So  when the heat started to pick up I wanted to put some of the beautiful leaves to use before the sun burned them all up. Oh and lets not forgot all of the amazing fresh fruit on hand!

I made two versions of the tarts, one with yogurt and one without, but for the sake of this post I’m sticking with the yogurt tarts…delish!

Ingredients

Simple Syrup

  • 1/2 cup water
  • 1/2 cup sugar
  • 1 tsp fresh lime juice
  • 1 sprig basil (5-6 leaves)

Tarts

  • 8 tart shells
  • 1/2 cup light n’ fit vanilla yogurt
  • 1/2 cup blackberries
  • 1/2 cup blueberries
  • 1/2 cup kiwi, quartered
  • 1/2 cup strawberries, quartered
  • 16 small basil leaves for garnish

Preheat oven to 375 degrees.

In a small saucepan heat the water and sugar over medium heat until the sugar is dissolved. Remove from the heat and stir in the lime juice and basil. Let the simple syrup rest until cooled and the basil has infused into the liquid. Strain into a small bowl and set aside.

Pierce the tart shells with a fork on the bottom and sides of the tart shells to prevent puckering. Bake until lightly golden brown, 8-10 minutes. Remove from the oven and cool.

Remove the shells from the tins and spoon one tablespoon of yogurt into each shell. Fill with the fruit and drizzle with the simple syrup. Top with two sprigs of basil.

**Side note: you could also mix all of the fruit together in a large bowl with the simple syrup then fill the tart shells.

Bon Appetit!

Creamy Orecchiette with Herbs & Shrimp

I’ve been on a major salad kick the last few weeks and have been trying to avoid my true loves, Mexican food and pasta. All the leafy greens and chicken have got the job done but the pasta craving hit me pretty hard the other night. Like all “master dieters” will say, instead of fighting the craving I decided to give in and opt for a guilt free, summery pasta to quench my carb craving.

I adapted the recipe from Cooking Light’s Orecchiette with Peas, Shrimp, and Buttermilk-Herb Dressing with just a few minor changes. It wouldn’t be dinner in my house if we didn’t eat past 9pm so needless to say I was starving by the time the pasta was done. I ate it hot (which was delicious) but I would definitely suggest letting the pasta cool (for 20-30 minutes) or refrigerate overnight. The flavors the next day were even better then the night before.

Ingredients

Serves 4

  • 8 ounces uncooked orecchiette pasta
  • 1 tbsp extra virgin olive oil
  • 1/2 cup yellow onion, chopped
  • 1 tsp salt, divided
  • 1/2 tsp ground black pepper
  • 8oz cremini mushrooms, sliced
  • 1/2 pound medium shrimp, peeled and deveined
  • 1/2 cup thinly sliced radishes
  • 1 cup frozen green peas
  • 1/3 cup reduced-fat mayonnaise
  • 1/4 cup fat-free buttermilk
  • 3 tbsp minced fresh chives
  • 1 tbsp chopped fresh dill
  • 1/2 tsp grated lemon rind
  • 1 tbsp fresh lemon juice
  • 1/4 tsp freshly ground black pepper
  • 1/8 tsp ground red pepper
  • 2 garlic cloves, minced

Cook pasta according to package directions, omitting salt and fat. While the pasta cooks heat the olive oil in a large dutch oven over medium high heat. Saute the onions until tender; add 1/2 teaspoon of salt and pepper. Stir in the mushrooms and cook until tender.

Add the shrimp and saute until mostly cooked through and translucent, around 2-3 minutes on each side. Add the green peas and radishes, saute until heated through. Remove from the heat and stir in the pasta. Use a splash of the starchy pasta water to scrape up any brown bits from the pan. Set aside.

Combine mayonnaise and remaining ingredients, including the remaining 1/2 tsp salt, in a small bowl; stir well with a whisk. Pour over the pasta and toss until nicely coated. Enjoy hot or refrigerate overnight for a tasty pasta salad lunch.

Bon Appetit!